Introduction
In this blog, we will be covering how to make a Vanilla JavaScript project modular and using the keywords import and export. The best part is we will only be using pure HTML, CSS, and JavaScript. No node or npm, Just plain old Vanilla JavaScript.
To get started, go ahead and create a new project folder with a file structure like so:
my-project-name /─┐
 js/─┐
     ┊ classes.js
     ┊ selectors.js
     ┊ main.js
 index.html
 style.css
Probably the best part of all this is just how easy it really is to do. Simply just put a script in the <head></head> of your HTML document.
Note: If you're here to just get the answer as to how, copy and paste the code snipper below.
With that setup, we can now use import and export in files.
Box creator — code along.
To demonstrate how to use import and export, we will be creating a box generator, nothing special, just some simple styles and some basic code.
First, go ahead and set up a style sheet for your style.css file. You can do that by adding the following into the document's <head></head>.
Then I add some basic styles.
Then will add some inputs to our HTML document along with a button to create said box.
Now for the JavaScript
Now that we have some style, we can begin to add JavaScript. Inside the selectors.js file, we will put the following.
Notice how we've used export. If you are not familiar with the Webpack, the keyword export allows us to use import on files and then user function and variables, etc. It is crucial to remember that if you use export on a variable whose value is not a function, the variable will only ever have one instance of itself.
I like to keep my code as organized as possible and looking pretty too, so I decided it would be best to export all selectors from a single file. When projects in vanilla JavaScript get more extensive, you often will have to use querySelector multiple times on the same element, so it is good to have a way of only ever writing the code once.
Now in our the classes.js file, let's create a custom JavaScript Object for Box will need to first create an array for all the boxes and import the createBox function from selectors.js.
NOTE: Because we are not using Webpack, we have no easy way of purging our file paths. This means that we must be extremely specific as to the file extension we use and what directory the file is in. If we try to import a file like so:
We will get thrown an error. So be sure that all your imports look like this, './myfileLocation.whateeverExt' if you do that you'll be set.
Next, we want to create a class, Box that will take in a name, color, height, and width.
This will allow us to have multiple instances of the same object. Keep in mind that I'm using the Math.random() built-in object method because there are infinite possible numbers between zero and one, so the likelihood that we get the same number twice is pretty much null. However, this is not a great way of generating an ID, and it would be better to use the cuid NPM package if you were to actually store this in a DB. However, I'm merely using it for demonstration purposes only.
We need to have a way of adding all the input values to the Box class. So in the main.js file, let's create a function just for that and add an eventListener to our button.
Will want to import the Box class from classes.js and all the input selectors, box-storage element, and our button from selectors.js.
Now will create a function for adding a box to the DOM.
And add an event listener that will use this function when the button is clicked.
You'll notice that if we try and test our code, nothing will be working, and that is because we have to add an instance method to our Box class. Back inside our classes.js file, let's add the following code to Box class.
Now, back inside the main.js, we can use our instance method to initialize the box.
Finally, to wrap up the code along, we will need to create a function that will append each box we create to the DOM.
Keep in mind that the initBox method pushes the div element into the boxes array, and we are importing the boxes array from clasess.js.
When all is said and done, we should be able to successfully create a box and give it a name, color, height, and width.
Final Result
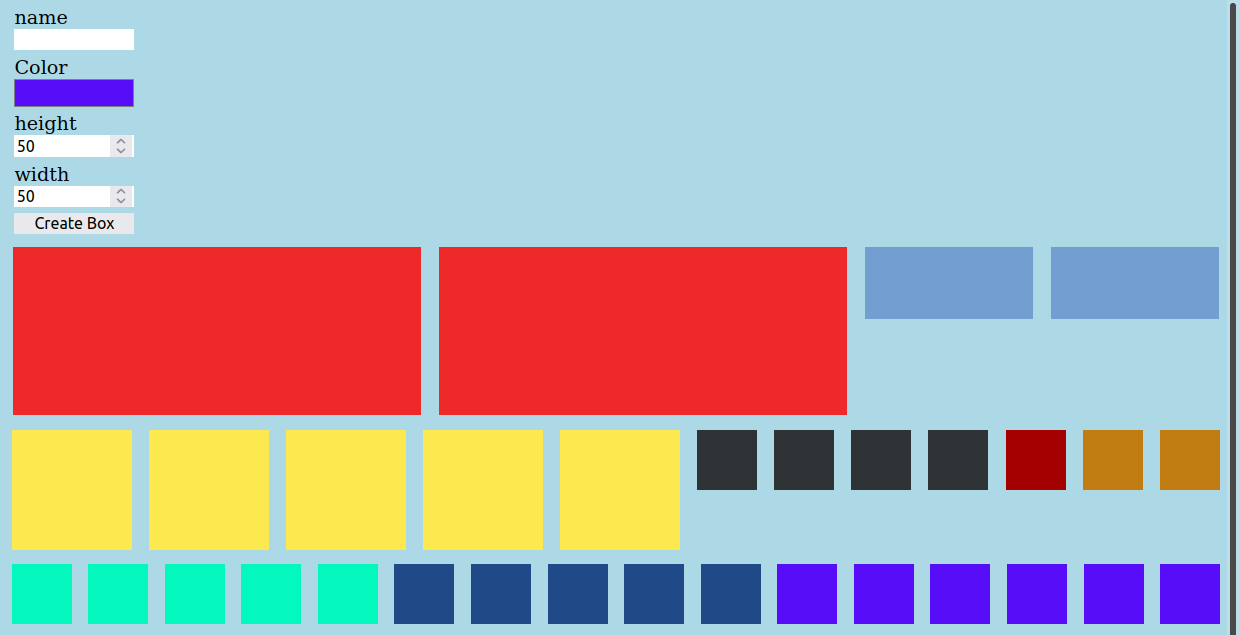
Box Creator For Modular Vanilla JavaScript
Conclusion
Hopefully, you found this tutorial helpful in some way or another. It is beneficial, especially if you've been asked to create a Vanilla JavaScript project for a future employer, to prove your skills to modularize code without using Webpack or Node. If you have any trouble with this tutorial or have any suggested edits, I encourage you to leave a comment or if there is anything you'd like me to explain in further detail.
Comments
Loading comments…