Meta just released a badass new LLM called Llama 2.
And if you are anything like us, you just can’t wait to get your hands dirty and build with it.
The first step to building with any kind of LLM is to host it somewhere and use it through an API. Then your developers can easily integrate it into your applications.
Why should I use Llama 2 when I can use Open AI API?
3 things:
- Security — keep sensitive data away from 3rd party vendors
- Reliability — ensure your applications have guaranteed uptime
- Consistency — get the same results each time a question is asked
What will this guide cover
- Part I — Hosting the Llama 2 model on AWS sagemaker
- Part II — Use the model through an API with AWS Lambda and AWS API Gateway

Step 0: Log in or Sign up for an AWS account
- Go to https://aws.amazon.com/ and log in or sign up for an account
- If you sign up for a new account, you will automatically be given Free Tier access, which does provide some Sagemaker credits, but keep an eye out on them since depending on your server selection the bill can get absurdly high
Part I — Hosting the Model
Step 1: Go to AWS Sagemaker
Once you are in your AWS Dashboard, search for AWS Sagemaker in the search bar, and click on it to go to AWS Sagemaker
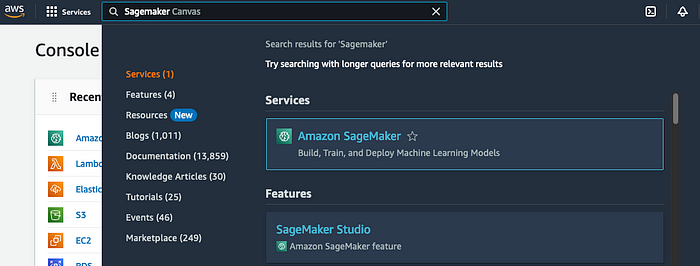
AWS Sagemaker is AWS’s solution for deploying and hosting Machine Learning models.
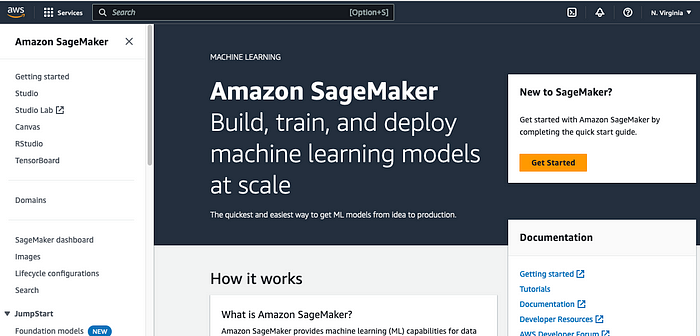
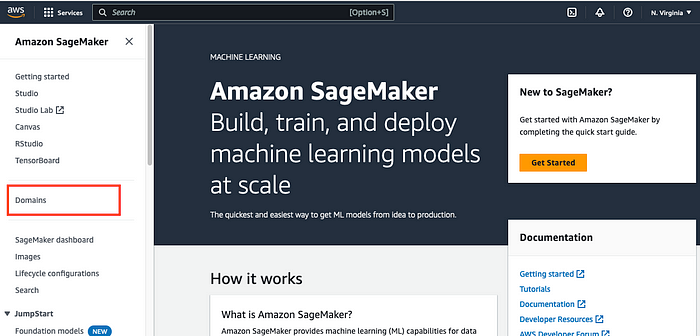
Step 2: Set up a domain on AWS Sagemaker
- Click on Domains on the left sidebar
2. Click on Create a Domain
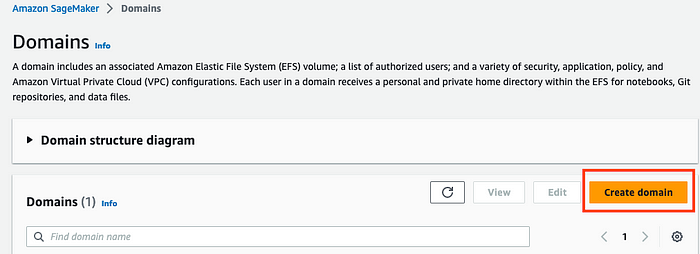
3. Make sure the Quick Setup box is selected
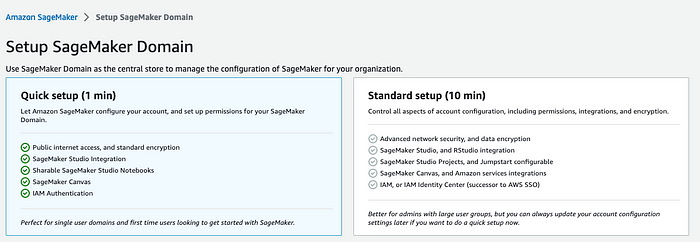
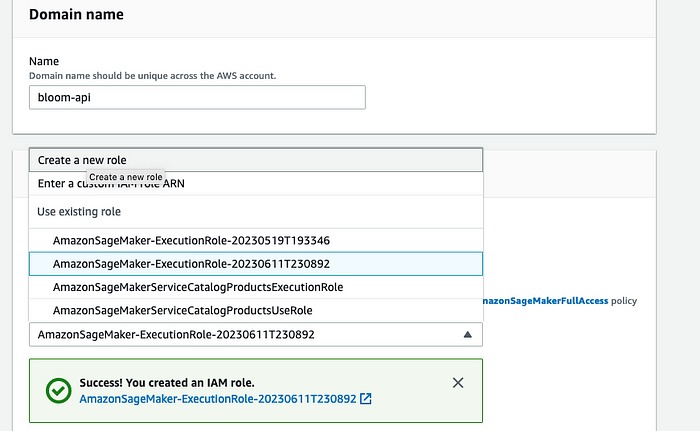
4. Fill out the form below with a domain name of your choosing and the rest of the options filled out as you see in the screenshot.
If you are new to this, choose create a new role in the Execution role category. Otherwise, pick a role that you may have created before.
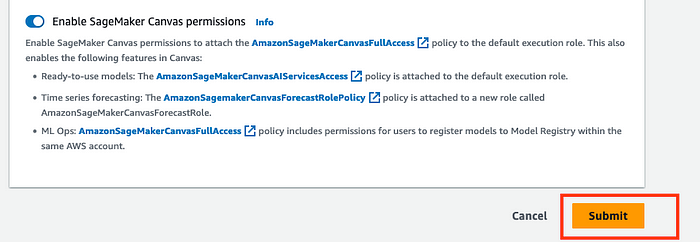
5. Click Submit on the form to create your domain
6. When the domain is finished being created, you will be shown this screen

Note down the user name you see here as it will be needed to deploy our model in the next step
If your domain had an error being created, it is likely due to user permissions or VPC configuration.
Step 3: Start a Sagemaker Studio Session
- Click on the Studio link in the left sidebar once your domain is finished being created.
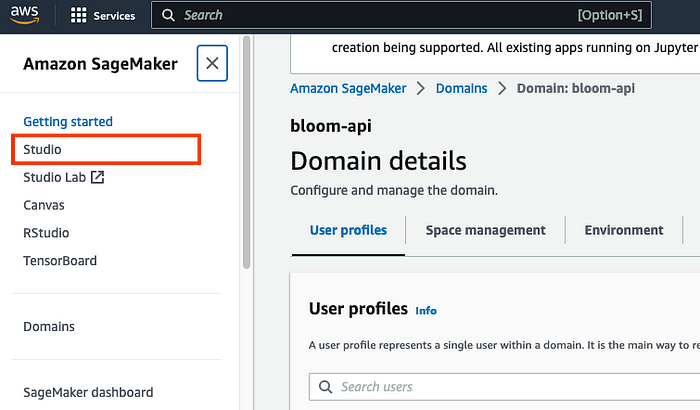
2. Select the domain name and the user profile you selected previously and click Open Studio.
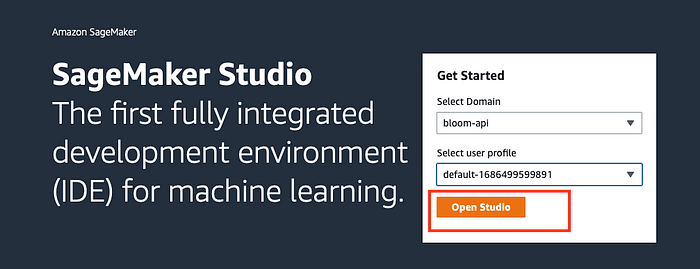
This will take you to a Jupyter lab studio session that looks like this.
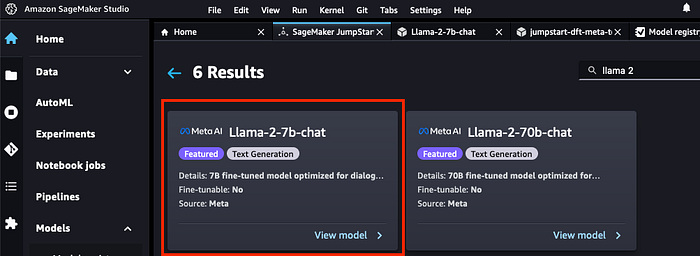
Step 4: Select the Llama-2–7b-chat model
We are going to deploy the chat-optimized & 7 billion parameter version of the llama 2 model.
There is a more powerful 70b model, which is much more robust, for demo purposes it will be too costly so we will go with the smaller model
- Click on Models, notebooks, and solutions in the left sidebar under the SageMaker Jumpstart tab

2. Search for the Llama 2 model in the search bar. We are looking for the 7b chat model. Click on the model
If you do not see this model then you may need to shut down and restart your studio session
3. This will take you to the model page. You can change the deployment settings as best suited to your use case but we will just proceed with the default Sagemaker settings and Deploy the model as is.

The 70B version needs a powerful server so your deployment might error out if your account does not have access to it. In this case, submit a request to AWS service quotas.
4. Wait 5–10 minutes for deployment to finish and the confirmation screen to be shown.
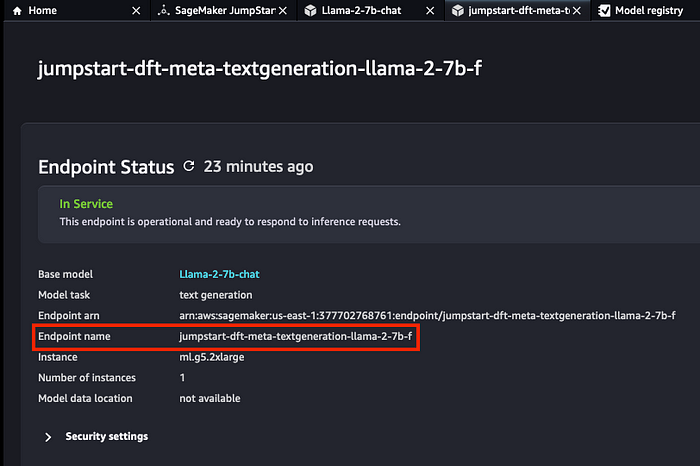
Note down the model’s Endpoint name since you will need it to use the model with an API.
And with that, you are now done with Part I of hosting the model. Have a beverage or snack of your choice to celebrate!
Part II — Use the model with an API
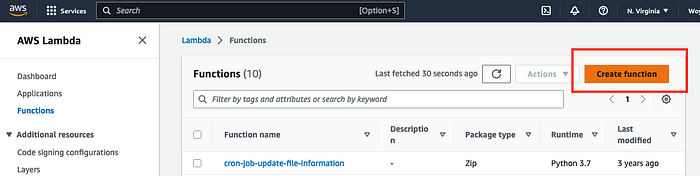
Step 1: Go to AWS Lambda to create a Lambda Function
A lambda function will be used to call your LLM model’s endpoint.
- Search for the Lambda service in the AWS console search bar and click on the Lambda service.

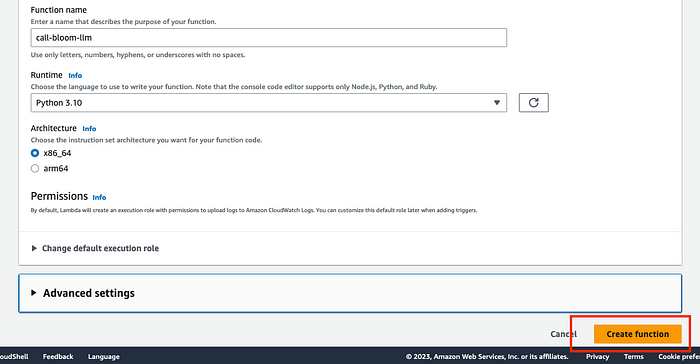
2. Click on Create function
3. Enter a proper function name (doesn’t matter what), choose Python 3.10 as the runtime, and the x86_64 architecture. Then click on Create Function
Step 2: Specify your model’s endpoint point
Enter the LLM model’s endpoint name from the last step of Part I as an environment variable.
1. Click on the Configuration tab in your newly created model.

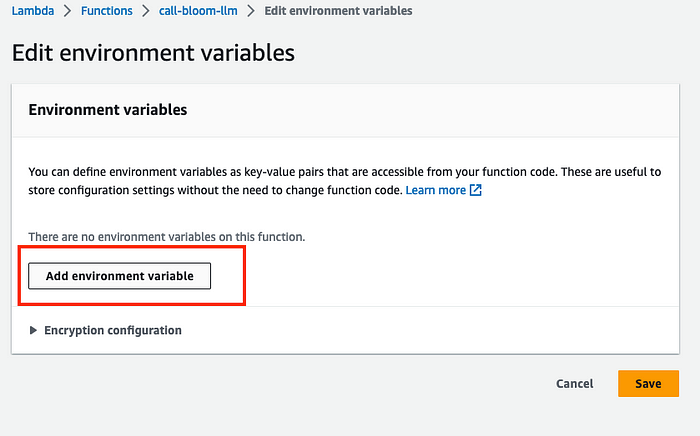
2. Click on Environment variables and click on Edit.

3. Click on Add environment variable on the next screen.
4. Enter ENDPOINT_NAME as the key and your model’s endpoint name as the value. Click Save.
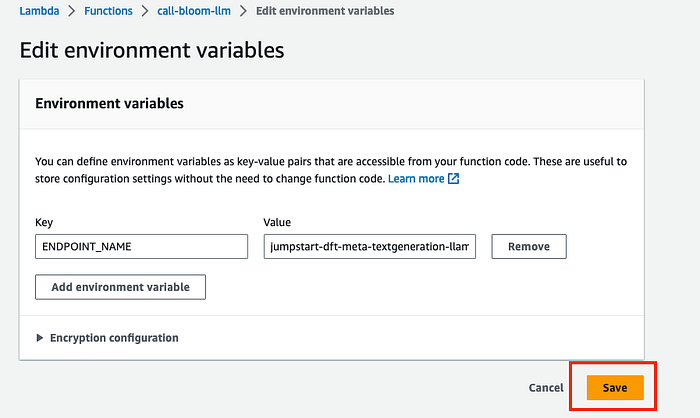
You can actually add anything for the key you wish but it will need to match up with what we write in our code to call the function later.
Step 3: Write the code that will call the Llama model
1. Go back to the Code tab and copy and paste the following code there.
import os
import io
import boto3
import json

# grab environment variables
ENDPOINT_NAME = os.environ[''ENDPOINT_NAME'']
runtime= boto3.client(''runtime.sagemaker'')

def lambda_handler(event, context):
    response = runtime.invoke_endpoint(EndpointName=ENDPOINT_NAME,
                                       ContentType=''application/json'',
                                       Body=event[''body''],
                                       CustomAttributes="accept_eula=true")

    result = json.loads(response[''Body''].read().decode())


    return {
        "statusCode": 200,
        "body": json.dumps(result)
    }
2. Click Deploy after the code is successfully inserted.

Step 4: Connect your new Lambda function to AWS API Gateway
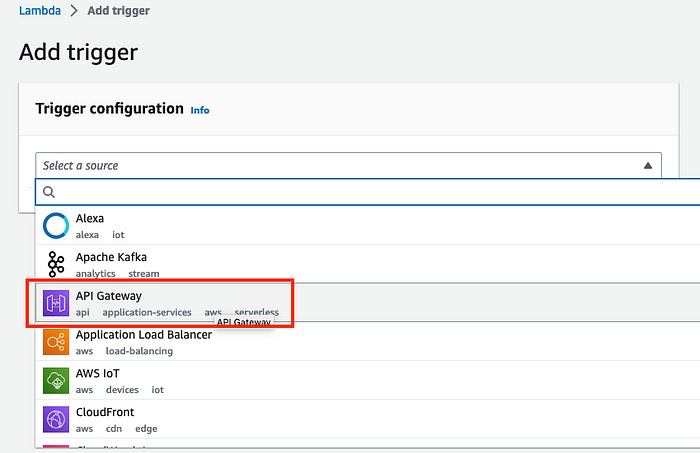
- Go to your Lambda function’s home screen and click Add Trigger.
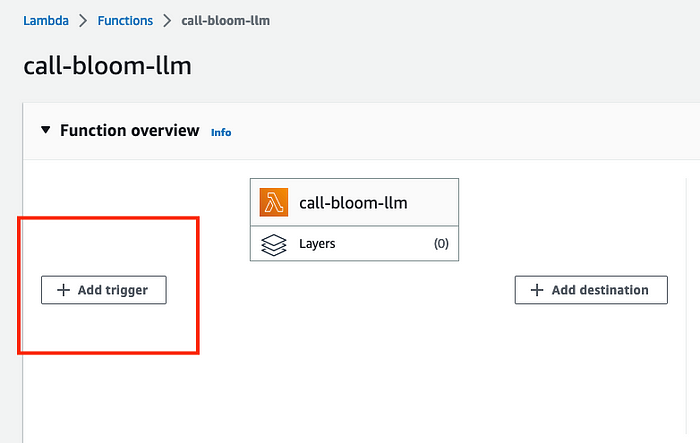
2. Select the API Gateway menu item in the Add trigger dialog.
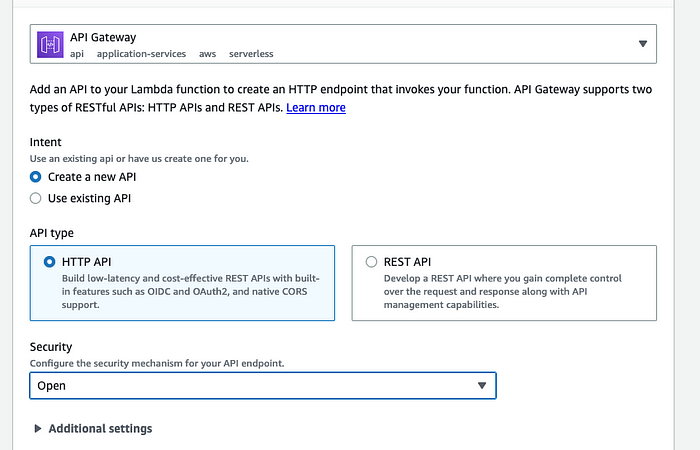
3. Fill out the API Gateway dialog as follows and click on Add.
4. After the API endpoint has been successfully created, you can view the API URL under the Configuration tab and Triggers sidebar.

Step 5: Test your brand spanking new LLM API
- Make a POST or GET request to your API URL with the following JSON body
{
 "inputs": [
  [
   {"role": "system", "content": "You are chat bot who writes songs"},
   {"role": "user", "content": "Write a rap about Barbie"}
  ]
 ],
 "parameters": {"max_new_tokens":256, "top_p":0.9, "temperature":0.6}
}
The inputs key stores an array with each element being 1 conversation between you and the chat bot.
The conversation is represented by a nested JSON object that contains role which signifies the “person” in the conversation and content which is the prompt
2. Check the response status code and the response JSON from the API. The status code should be 200 and the response JSON will be like the following
[{"generation": {"role": "assistant",
"content": " Yo, listen up, I got a story to tell
''Bout a doll that''s fly, and she''s doin'' well
Barbie, Barbie, she''s the queen of the scene
From Malibu to Kenya, she''s always lookin'' supreme
She''s got the style, she''s got the grace
She''s got the swag, she''s got the pace
She''s got the cars, she''s got the cash
She''s livin'' large, she''s got the flash
She''s got the perfect body, she''s got the perfect face
She''s got the perfect hair, she''s got the perfect pace
She''s got the perfect life, she''s got the perfect vibe
She''s got it all, she''s got the perfect ride
She''s got Ken by her side, he''s her main man
He''s got the skills, he''s got the plan
They''re livin'' large, they''re got the fame
They''re the perfect couple, they''re got the game
So listen up,"}}]
You can use the following Python code to test the API. Replace the value for the api_url with the API Url that you created in the last step 4
import requests

api_url = ''https://spip03jtgd.execute-api.us-east-1.amazonaws.com/default/call-bloom-llm''

json_body = {
 "inputs": [
  [
   {"role": "system", "content": "You are chat bot who writes songs"},
   {"role": "user", "content": "Write a rap about Barbie"}
  ]
 ],
 "parameters": {"max_new_tokens":256, "top_p":0.9, "temperature":0.6}
}

r = requests.post(api_url, json=json_body)

print(r.json())
Potential Errors
You might receive a few errors in this scenario:
- Permissions: if your role does not have permission to use the Sagemaker invoke endpoint policy, then you will not be able to call the endpoint.
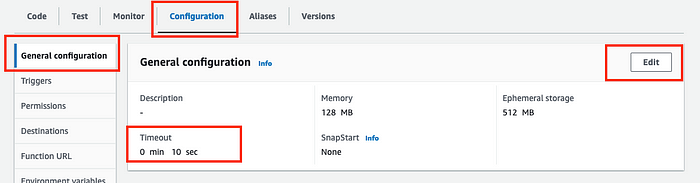
- Timeout: depending on your prompt and variables, you may receive a timed-out error. Unlike permissions, this is an easy fix. Click on Configuration, General, and Edit Timeout and set the timeout value to more seconds
Update: please refer to the comments if you continue to receive an error. There are great responses by the readers on how to debug!
Conclusion
This post shows you how to use the most powerful LLM to date
There are many reasons you should consider using your own hosted open-source LLM as an API such as:
- Security
- Reliability
- Consistency
Comments
Loading comments…