Every now and then you come across a new library that has no example to play with it. No code example or look and feel. If this ever happened to you you are not alone. We all can feel the pain of working on some project that has bad or no documentation at all.

Photo by Damian Zaleski on Unsplash
Today we will go to the other side of the equation and learn how we can properly document our React applications very easily!
When Does Documentation Become Important?
-
You have multiple teams working on the same project.
-
You are building some component library that is used by many people.
-
You forget things very easily.
Advantages of Having Good Documentation
-
It's a sign that the developers care about this project.
-
It helps new people to understand the project quickly.
-
Good documentation reduces the chance of misunderstanding.
-
The documentation itself can be a great asset besides your application.
-
Good documentation can sometimes work as a style guide for others.
-
Documentation increases the value of a project.
There are many ways today we will be using react-styleguidist. So let's get started
Step 1. Install dependencies
First, install the required dependencies:
npm install --save-dev react-styleguidist
Step 2. Start Server
You don't need to configure anything if you created your app with create-react-app. Now start the dev server.
npx styleguidist server
If you want to build your documentation you can build it as a static resource.
npx styleguidist build
Step 3. Start Basic Documenting
Before starting to add any kind of documentation you need to remember one thing that react-styleguidist will by default look inside the src/components directory and try to match any file with an extension of .js, .ts, .jsx, .tsx, etc.
So make sure you have all your components under the directory named components. You can override this behavior if you like.
Also, this library is smart enough to find out the appropriate components that need documenting. For example, it excludes all files inside tests folder.
First, create a new component named CustomButton.tsx It is a very simple button component that takes a title as a prop.

CustomButton.tsx
This is a very standard and simple component with TypeScript. Here the ButtonProps is defining which prop should be passed into this component.
If you don't use TypeScript you can achieve a similar result with ReactPropTypes
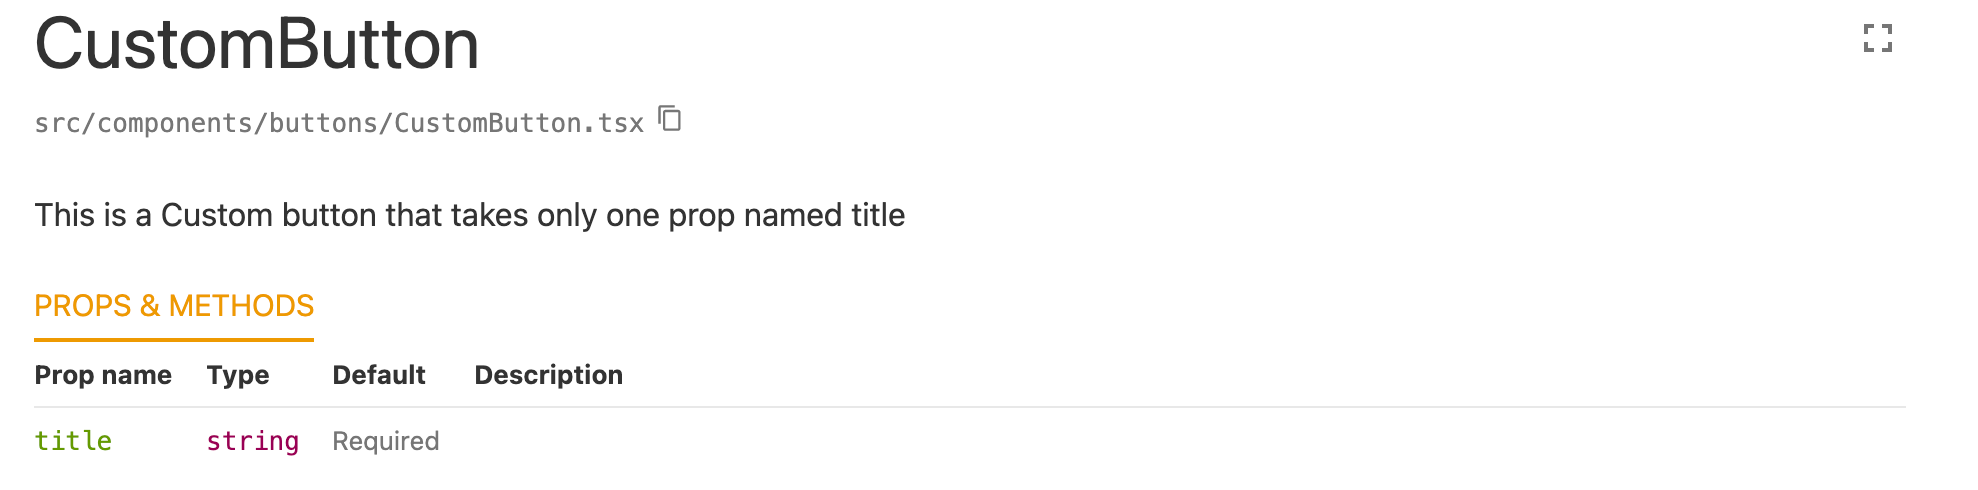
Now spin up the server and go to http://localhost:6060/ to see your Documentation server in action. There you can see without adding a single extra line react-styleguidist already generated a basic definition for our Component that looks like this!

Basic Documentation
So Cool! Okay, let's add some description to this component.
Step 4. Add More Description
If you are familiar with JsDocs, this is something you already know. But don't worry for now. Just add the following piece of comment inside your CustomButton Component:
/**
 * This is a Custom button that takes only one prop named title**
 */
Just save and see the results on the browser in realtime!
Component with description
Okay cool. So now we have our documentation for the component that defines the required props and a description with it.
But we now want to let people see how this component looks in real-life without forcing them to use this.
How to do that?
Step 5. Add Interactive Example
Now create another file named CustomButton.md inside the same folder and add the following code inside that:

CustomButton.md
Now this markdown file will act as an interactive playground for us. We can see how the component looks and feel to use. We can change the props from inside the documentation to see the effects!
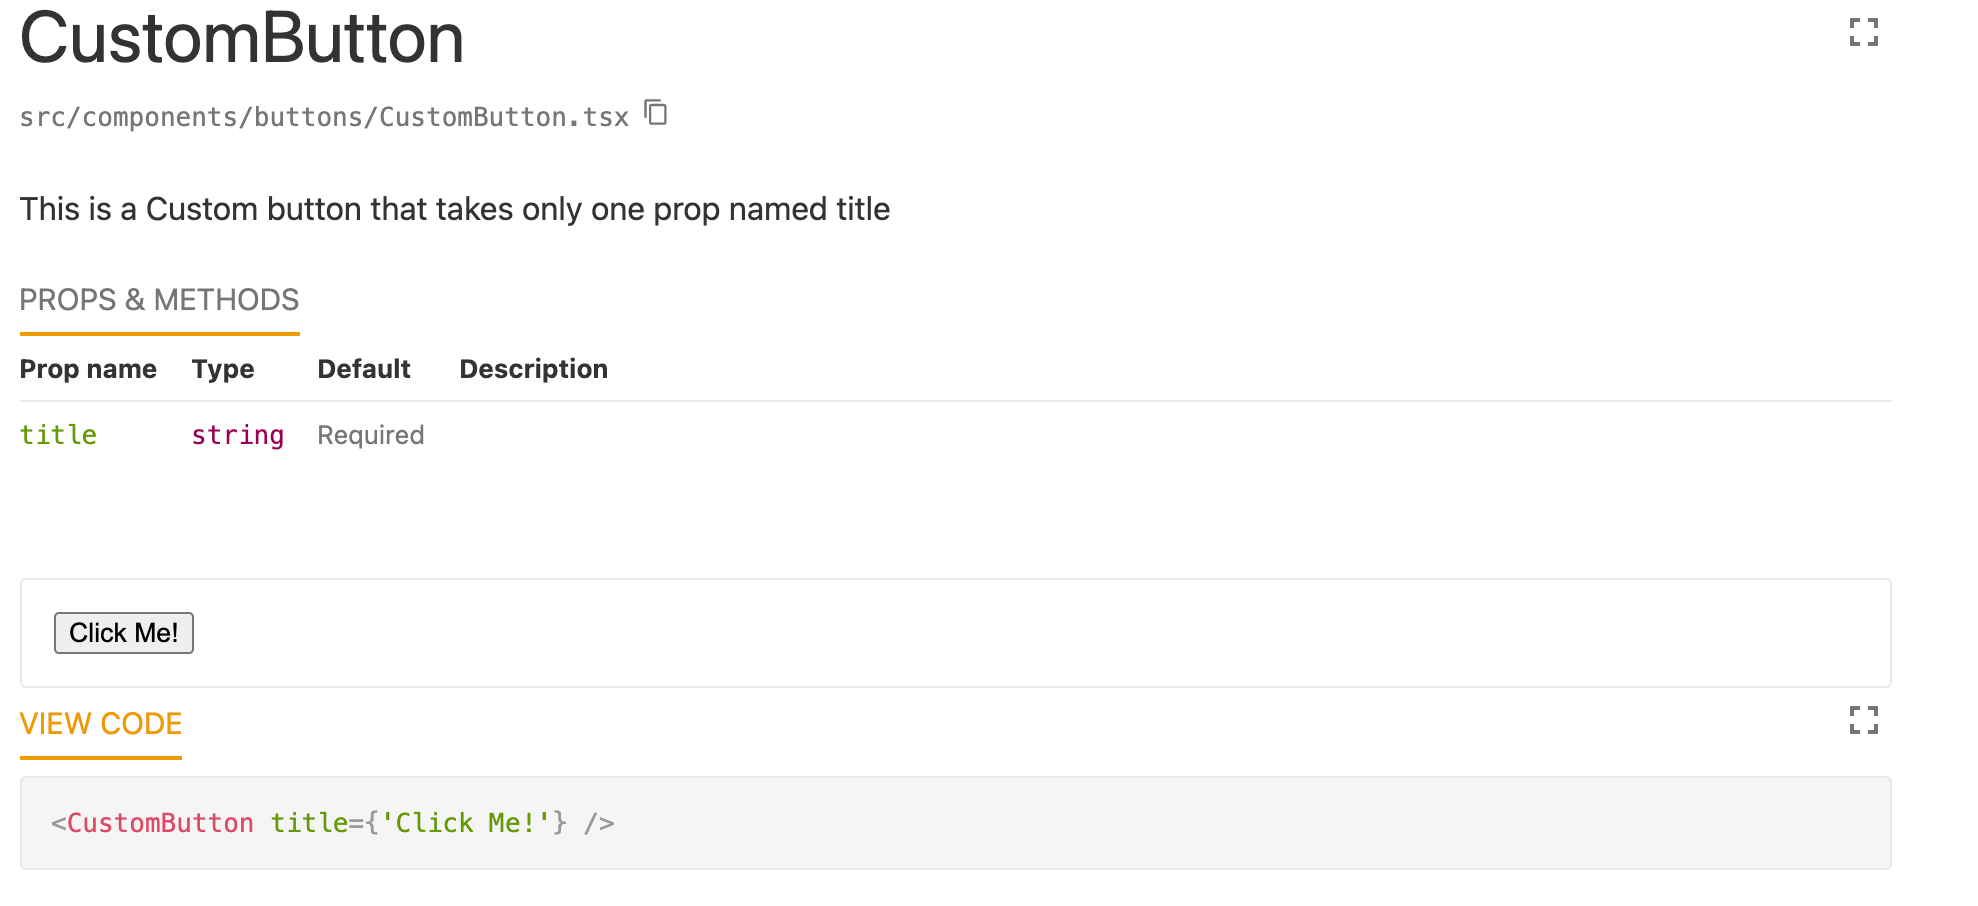
Interactive Example
So now we can change the title from the editor below and view the change.
We can do much more with this. Check here to learn more.
Okay, so today we learned how we can start documenting our react applications very easily.
That's it for today. Happy Coding! :D
Get in touch with me via LinkedIn or my Personal Website.
Comments
Loading comments…